This how-to-guide shows you how to get started with Universa. We cover creating an account, claiming your ICO/bounty tokens and we take a look at the UTN/UTNP swap. Want to know more about Universa? Check our other posts about the project.
Creating an account at Universa
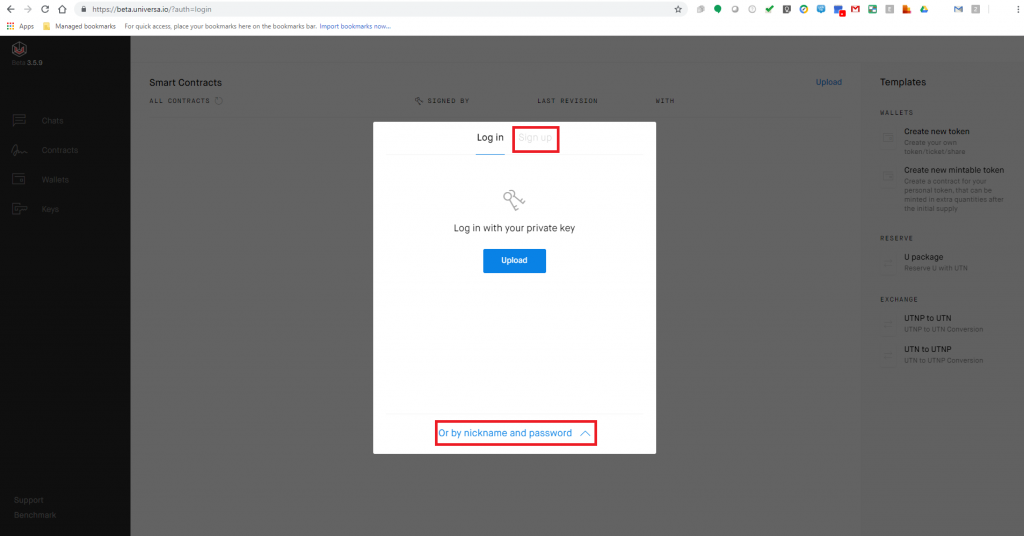
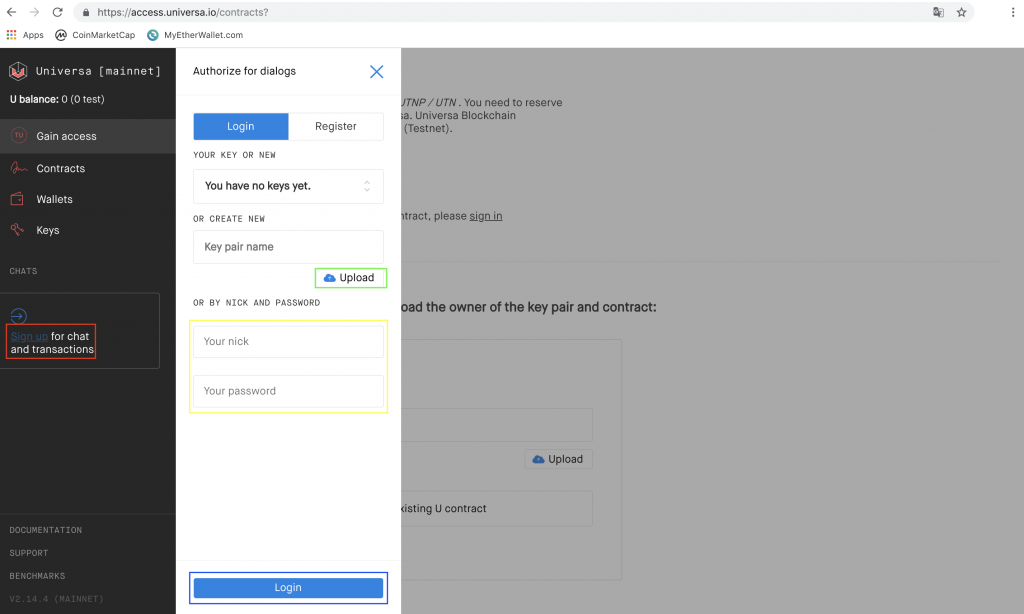
A login screen should appear (see Figure 1). Select “Sign up” (see the red box in Figure 1) and press the blue button that says “Start”.
Now you can provide a name for your key pair and choose between the size, 2048 or 4096 (see Figure 2). A 2048 bits key should be sufficient for basic use. The 4096 bits key provides the ultimate level of security and seems more future proof. In the latter case, the transactions within the Universa Network may be a little more expensive though!
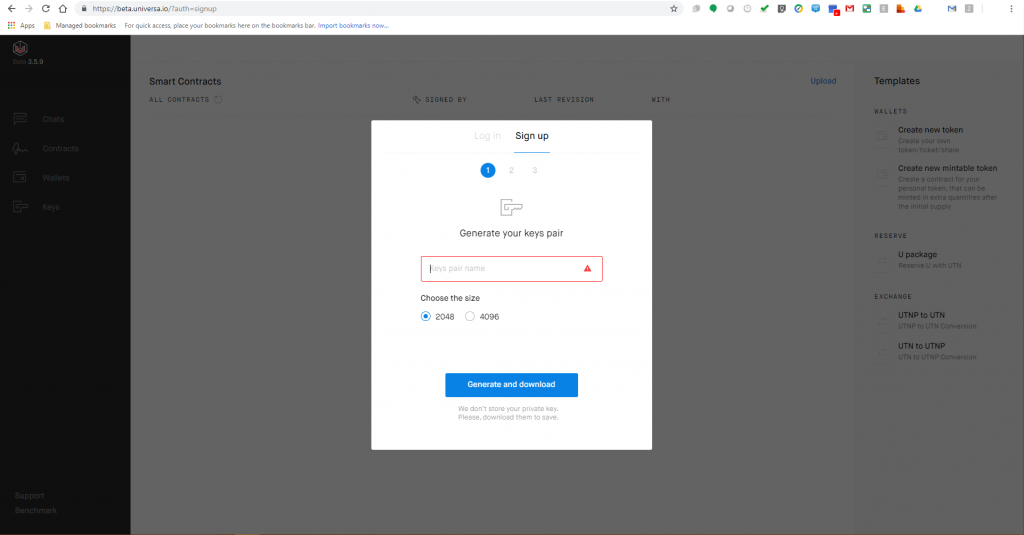
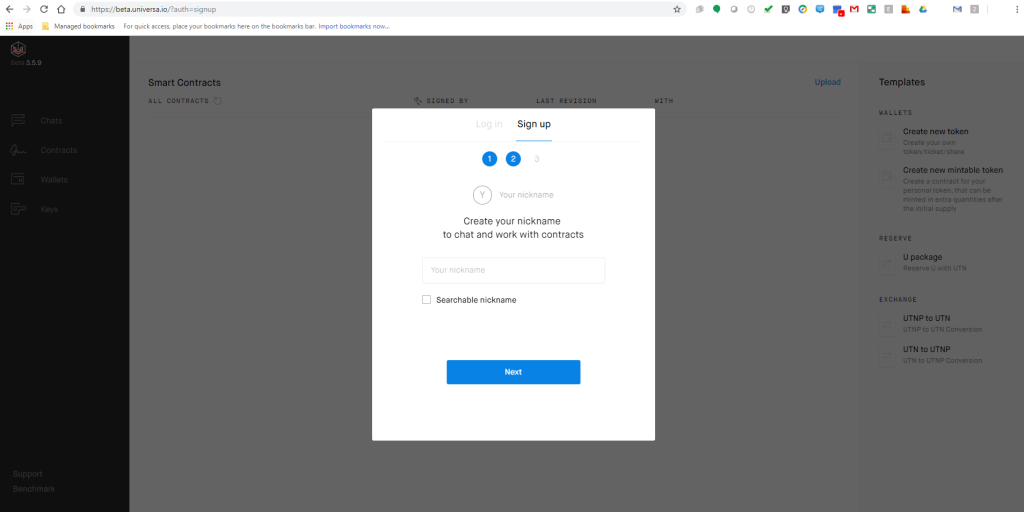
After choosing a name for the key and the desired size, press the blue “Generate and download” button. Now that you have generated and downloaded your private key, PLEASE MAKE SURE TO STORE THIS SAFELY AND SECURELY! This file is now the key for your future Universa holdings. If you lose your private key file, you lose control of your tokens, contracts and other Universa belongings! You should now see a screen to create your nickname (see Figure 3). This can be used to chat, work with contracts or for logging in after creating a password. You can also choose to have a searchable nickname or not (for chatting purposes).
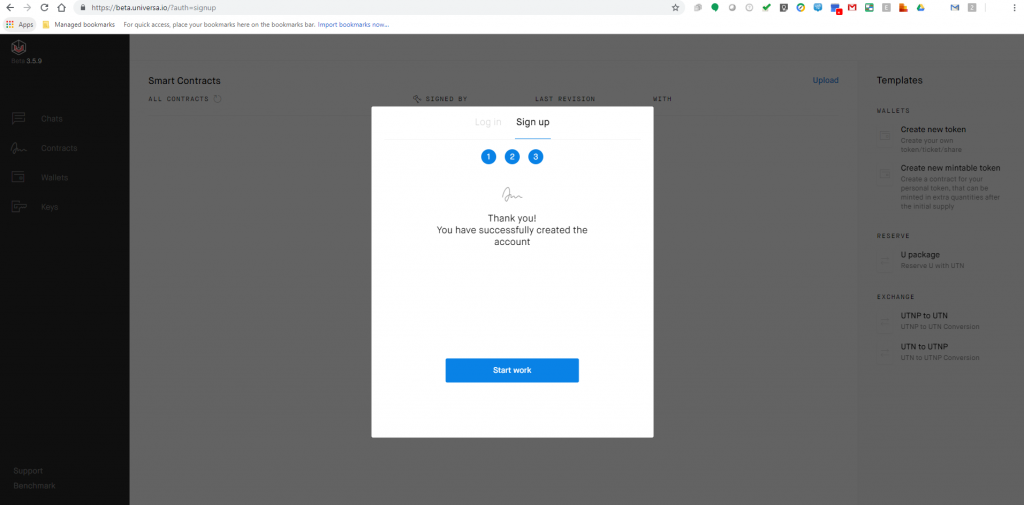
After choosing a nickname that’s still available, you should see a screen confirming the creation of your account and a blue button with “Start work” (see Figure 4). Press the button to proceed.
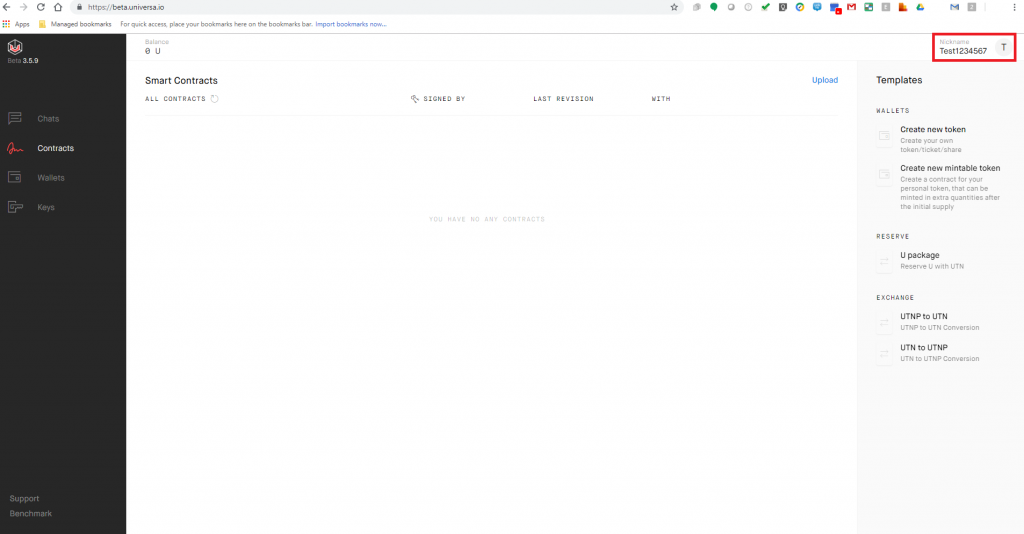
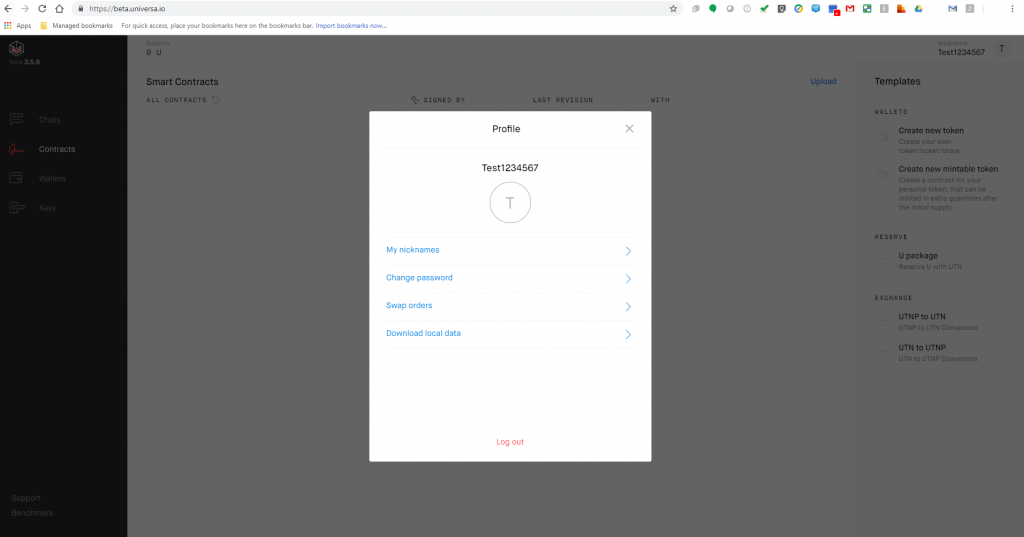
Great! Now you have an account on the Universa MainNet, a private key and a nickname which can both be used to login and accompanying addresses (to learn your address, read below).To view your profile, click on your nickname in the top right corner (see the red box in Figure 5). Here you can manage your nicknames (you can edit or add others), create/change your password, see your swap order history, download local data and log out from your account (see Figure 6). After you have created a password (please make sure to use a strong password), you can also login using your nickname and password (see the green box in Figure 1). Otherwise you can login by uploading your private key after clicking the blue button “Upload” in Figure 1.
Discovering your Universa key/wallet address
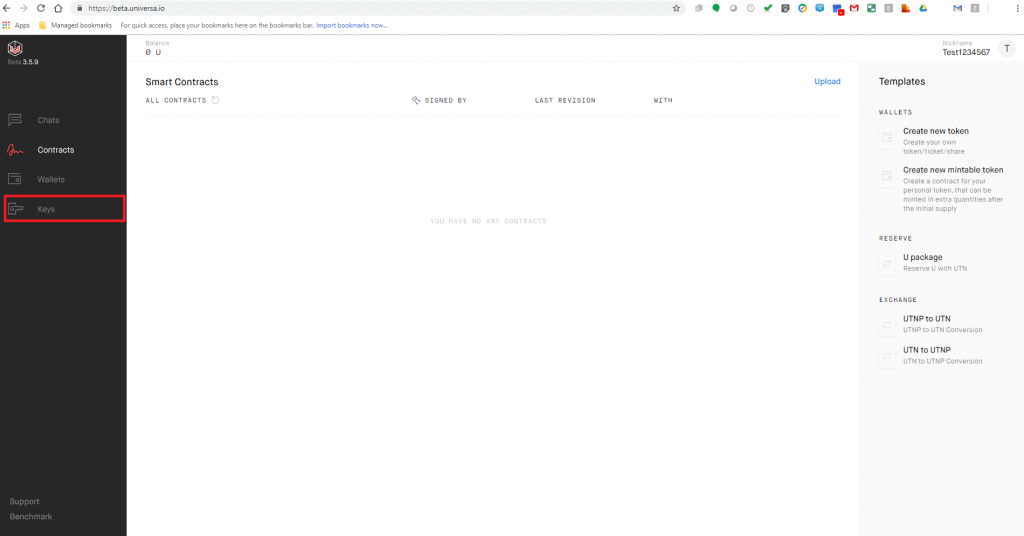
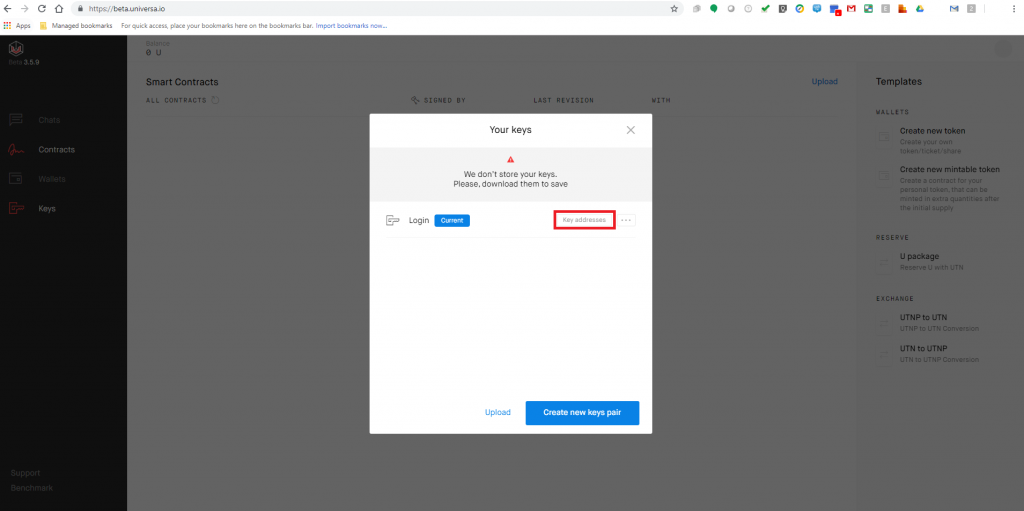
This part is easy! After you have logged in to your account on the Universa MainNet, click on “Keys” in the menu on the left (see the red box in Figure 7). A window should appear showing you your key with the name you gave to it (see Figure 8). For the purpose of this piece I have named the key “Login” which is why it shows that. Click the button “Key addresses” (see the red box in Figure 8) and the window will display your short and long address.
How to swap UTNP for UTN?
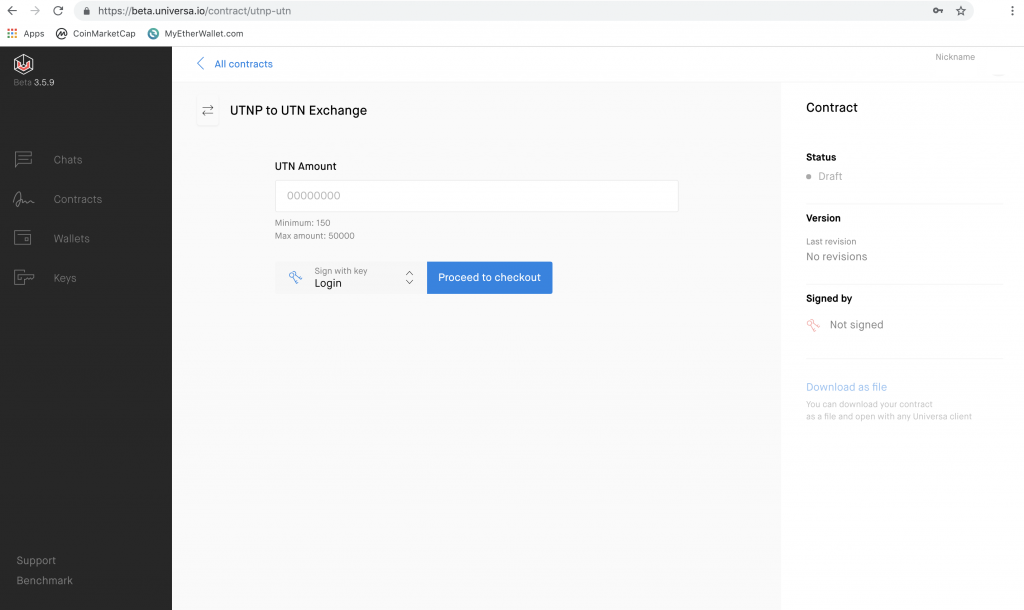
Why this order? Why not first go over the process of reserving U? Well that’s simple! You’ll need UTN to be able to reserve U. U’s are used to buy transactions on the network. If you don’t, you will not be able to start the process of reserving U. In the menu on the right of your starting window you’ll see a button for “UTNP to UTN” (see the red box in Figure 9).

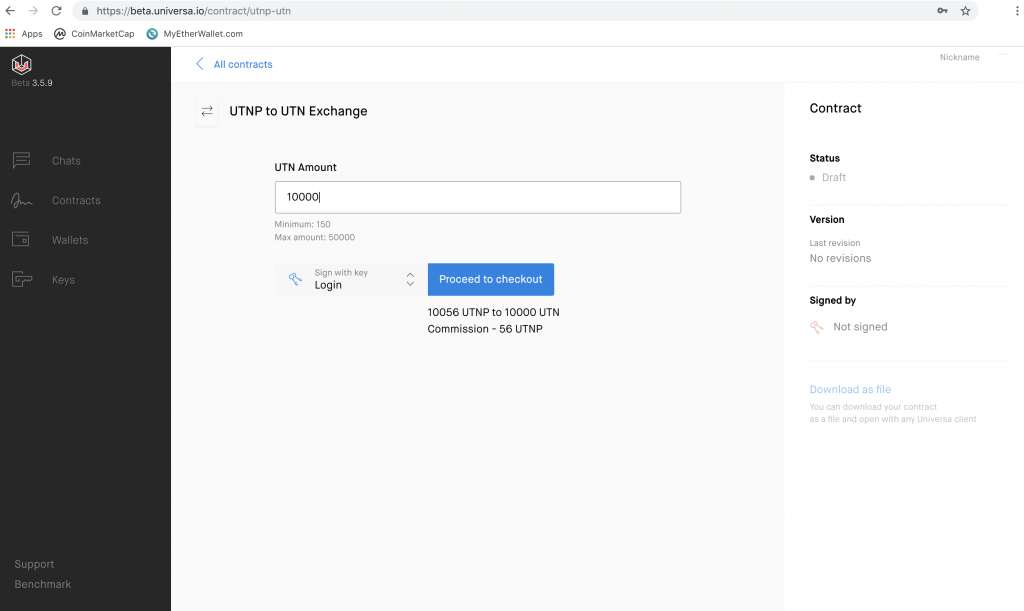
After clicking this button a window for swapping UTN for UTNP will appear (see Figure 10). Here you can fill in the amount of UTNP you want to swap in exchange for UTN. After filling in amount to swap (with at the time of writing a minimum of 150 and a maximum of 50000 tokens) you’ll see the number of tokens that you are about to swap. The commission (this is to cover the transaction fees) is displayed. At the time of writing this is 56 UTNP (which at the time of writing translates to roughly 0.39USD), see Figure 11.
Now proceed by clicking on the blue button that says, “Proceed to checkout”. You’ll now be presented with a window such as Figure 12, which will display an address to transfer the UTNP for the UTN swap. Now make sure to transfer the amount of UTNP you wish to swap to UTN to the specified address through your preferred method of ERC20 transfers (MEW, Trezor, Ledger, MetaMask, etc.).
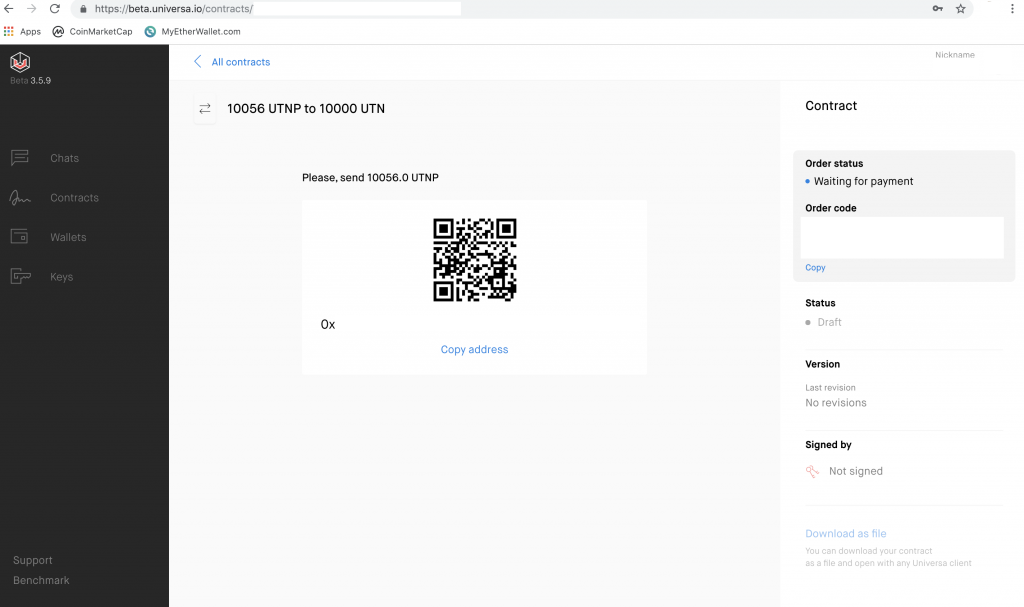
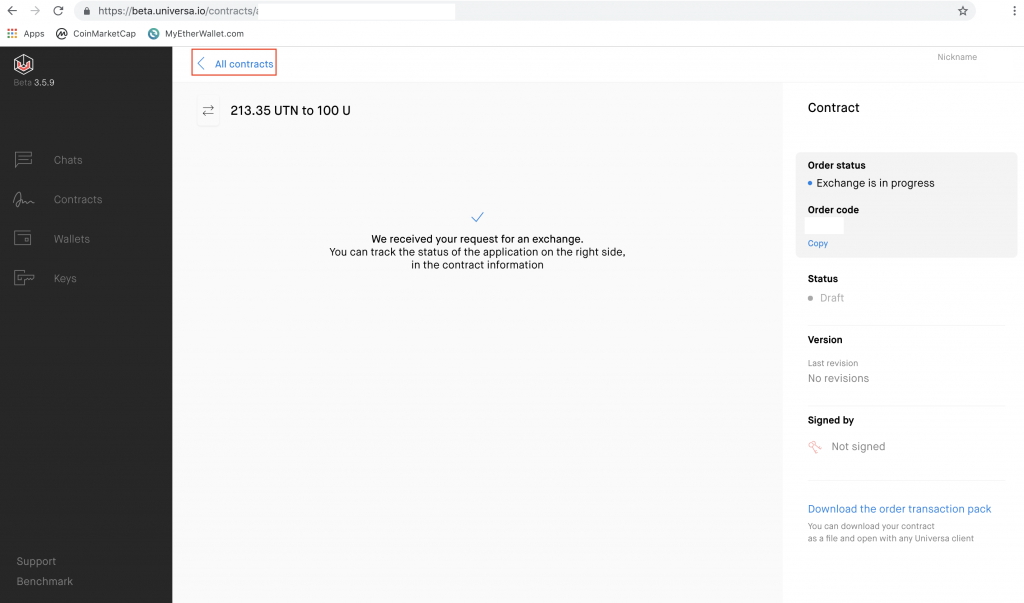
After your transaction is completed it might take some time before the Universa Network will recognize this (it will wait for at least 12 confirmations from the ETH network). After it has been approved you should see the window as in Figure 13. If you now go to your contracts page, you’ll see your swapped UTN there! Congratulations, the swap is now complete!
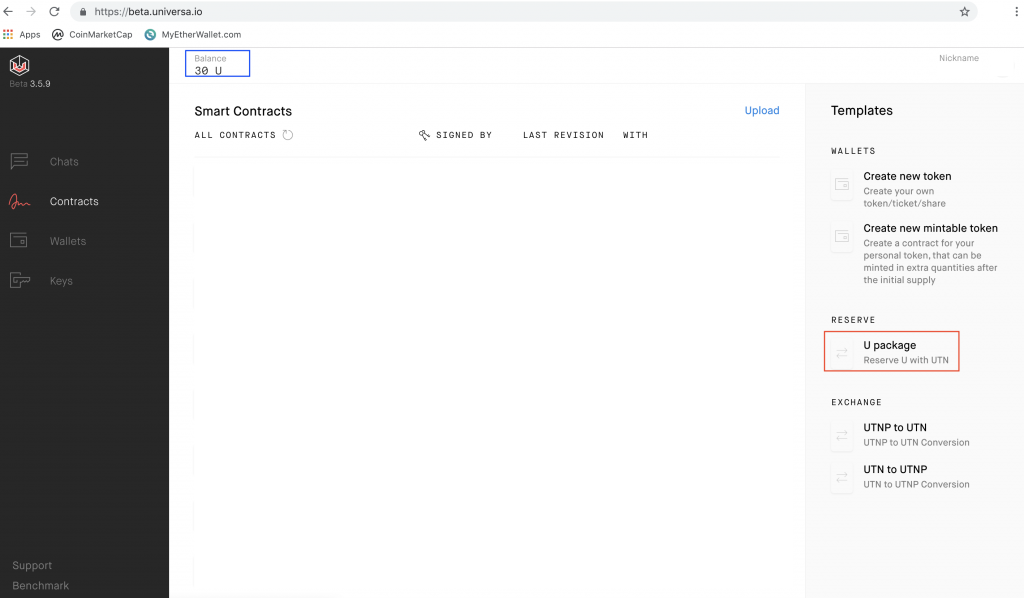
How to reserve U
Please take a look at Figure 14 and click on “U package” (see the red box in Figure 14). After clicking, a window should appear just like Figure 15. Here you can fill in the amount of U you would like to reserve and it will display the amount of UTN you will be charged for the operation. Keep in mind that the rate of U is aimed to be 0.01 USD. The rate is a dynamic one that checks for market prices of UTNP and translates this to the value of UTN providing an UTN:U rate.
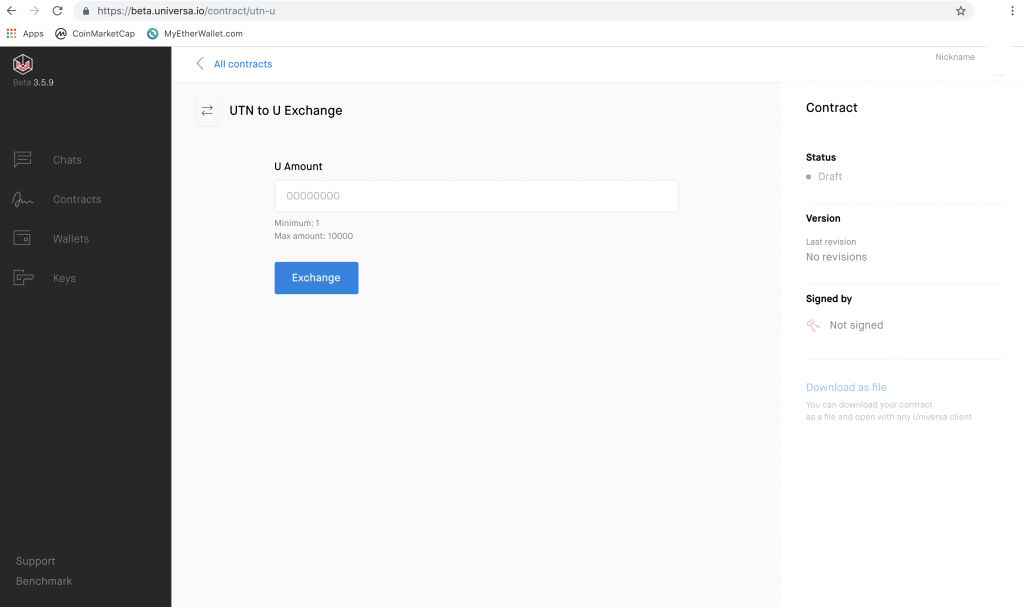
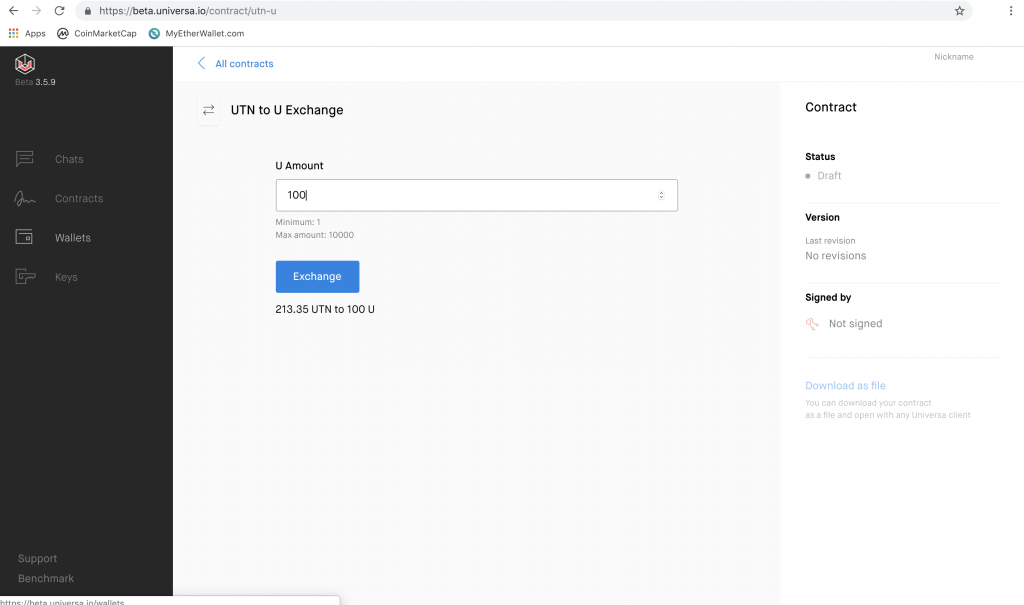
After filling in the desired amount of U, and being provided with the charged amount of UTN (see Figure 16, in this example 1U = 2.1335 UTN) press the blue button that says “Exchange”. Now you’ll get a screen just like Figure 17. You can click on “All contracts” (see the red box in Figure 17) and wait for the exchange to be completed. Once it says “approved” (see Figure 18) you will notice that your amount of U has increased (see the blue box in Figure 14). There you go! You have obtained U to perform transaction on the Universa Network!

How to swap UTN for UTNP?
Still here? Good! Then let’s get on with the following part of this piece, the swapping of UTN for UTNP.
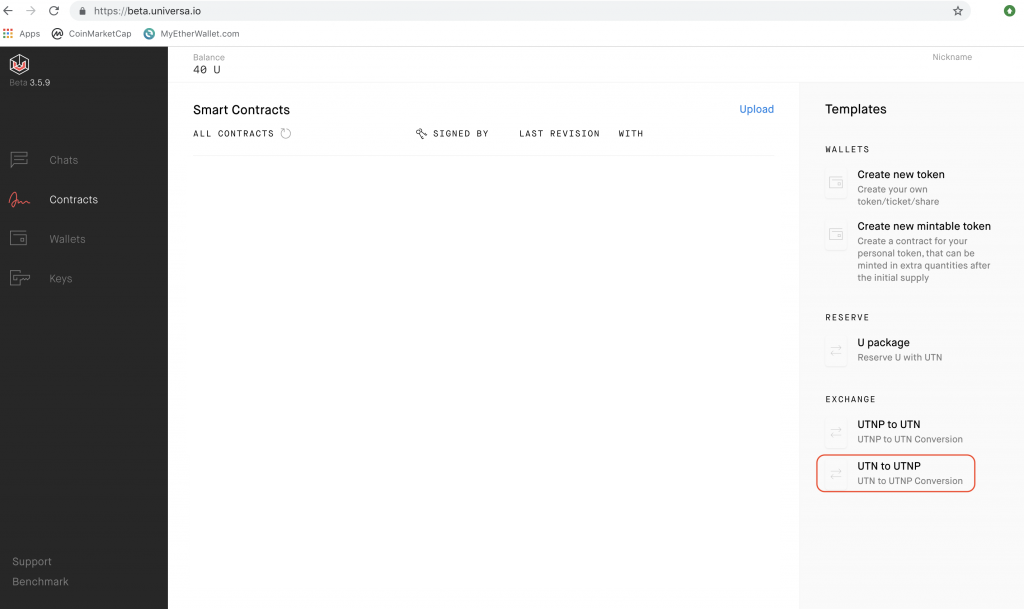
Before doing this, make sure you own UTN in a wallet on the MainNet (it’s hard to swap something you do not have) and that you have an U balance (otherwise you can’t perform the transaction). Go to the contracts page at https://beta.universablockchain.com and click on UTN to UTNP (see the red box in Figure 19).
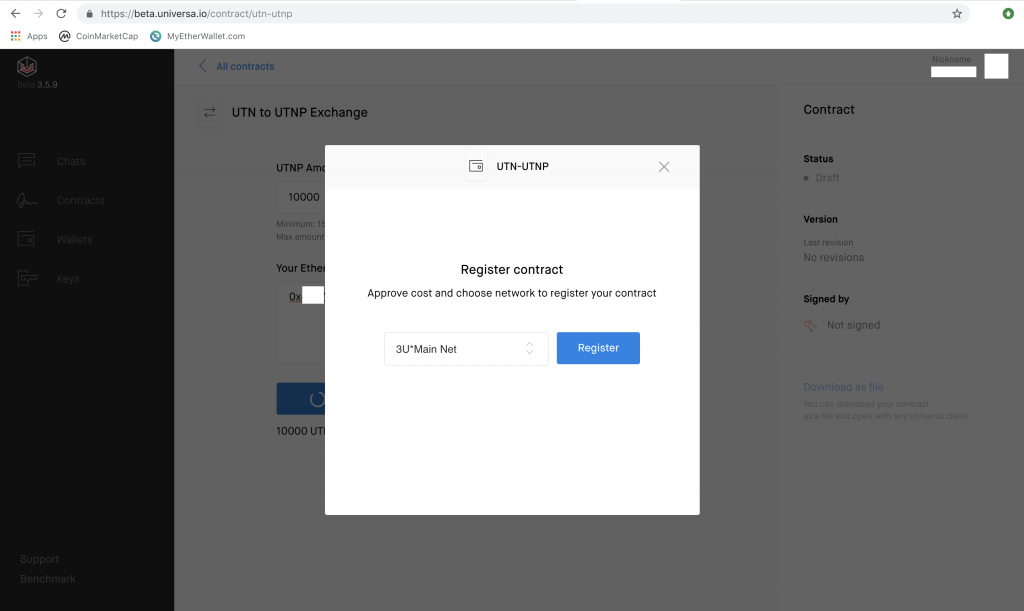
After clicking you’ll see a window just like Figure 20. Here you can fill in the amount of UTN you want to swap (see the red box) in exchange for UTNP. After filling in amount to swap (with at the time of writing a minimum of 150 and a maximum of 10000 tokens) you’ll see the number of tokens that you are about to swap.
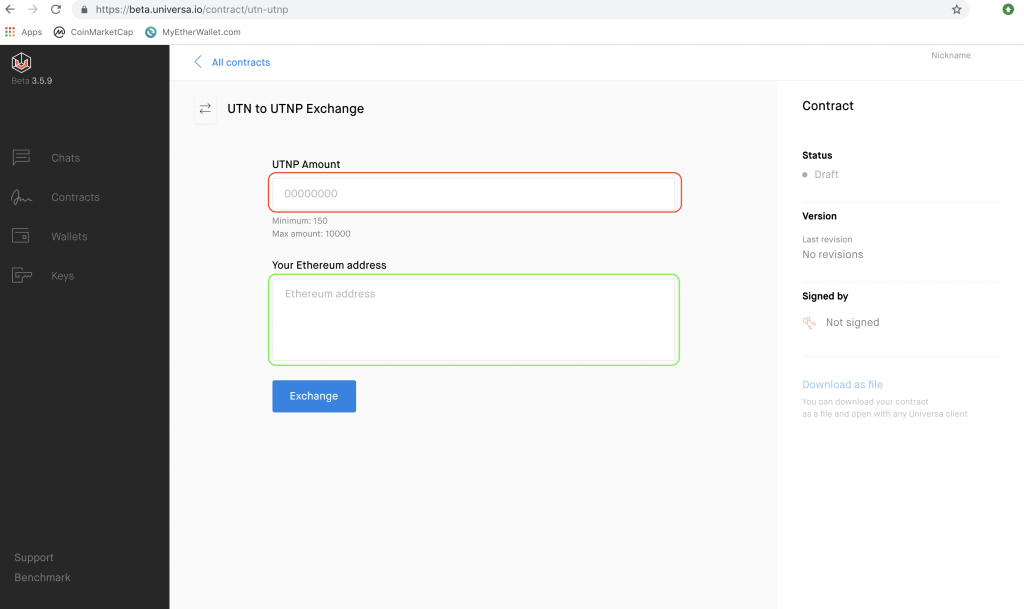
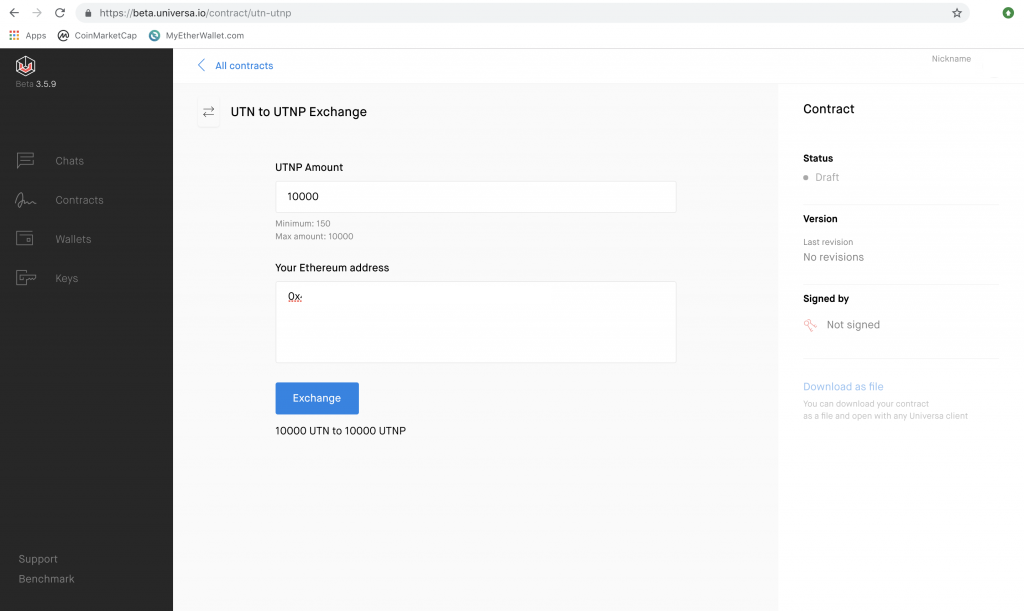
Make sure to fill in your ERC20 wallet address in the green box in Figure 20 to be able to receive your UTNP. This should yield something like Figure 21. After filling in click the blue button that says “exchange” and a window such as Figure 22 should appear. Here you will be informed of the amount of U you will be charged for this operation and where it will be registered (which in this case is the MainNet as it is an UTN>UTNP swap). Click the blue button that says “Register” to proceed.
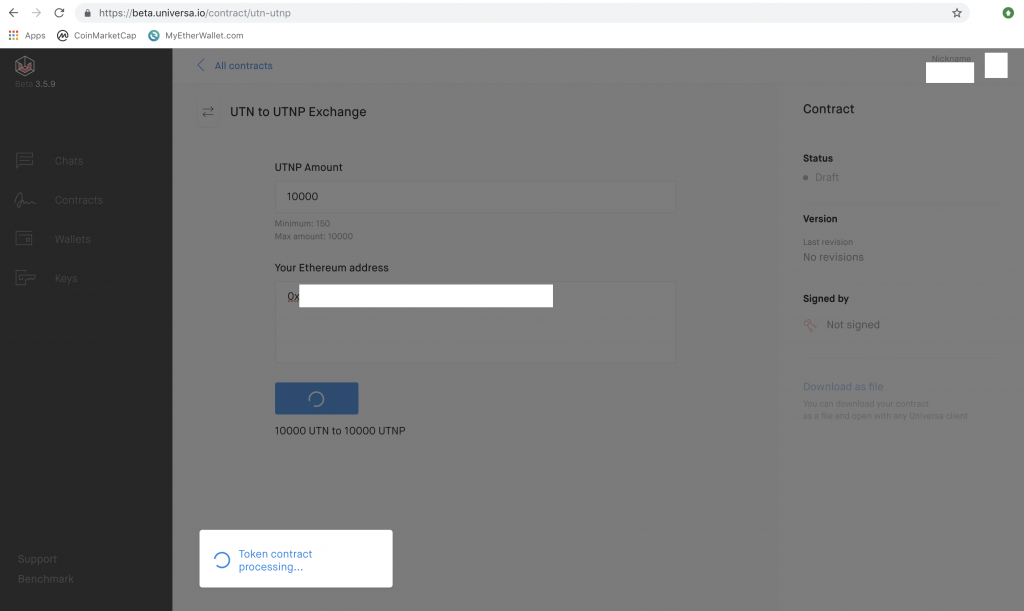
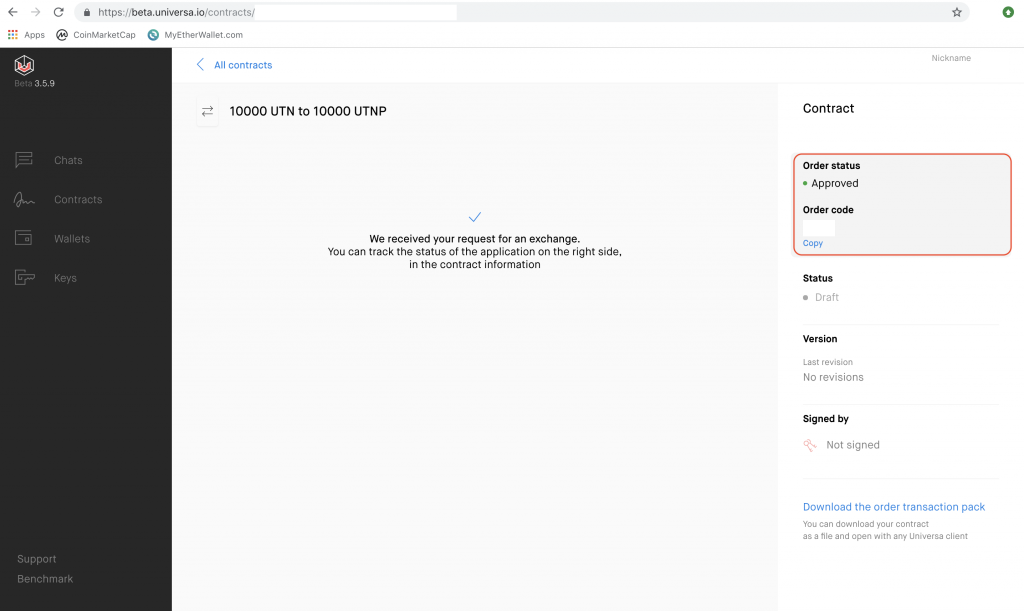
The window will disappear and you should see that it is processed (see Figures 23 and 24). After approval the status will be updated (see the difference in the red boxes on Figure 24 and 25). Check your ERC20 wallet, the UTNP should have arrived. That’s it! You swapped your tokens!

Figure 23

How to withdraw your UTN from the Token Sale or Bounty Program to the Universa MainNet
First of all, if you started reading this part of the text before reading the rest, go back to the part on how to create an account, follow those steps and then come back here! Got an account at the Universa MainNet? Great! To be clear: I’m going to explain steps to obtain your tokens in the Universa MainNet but I am going to do so a bit differently than the steps as described in the e-mail about your token delivery. I’m taking this approach since I believe it is a bit more foolproof although it has a few additional steps.
Here is what you do:
1) First things first; make sure to check the Inbox of the email address that is linked to your account at
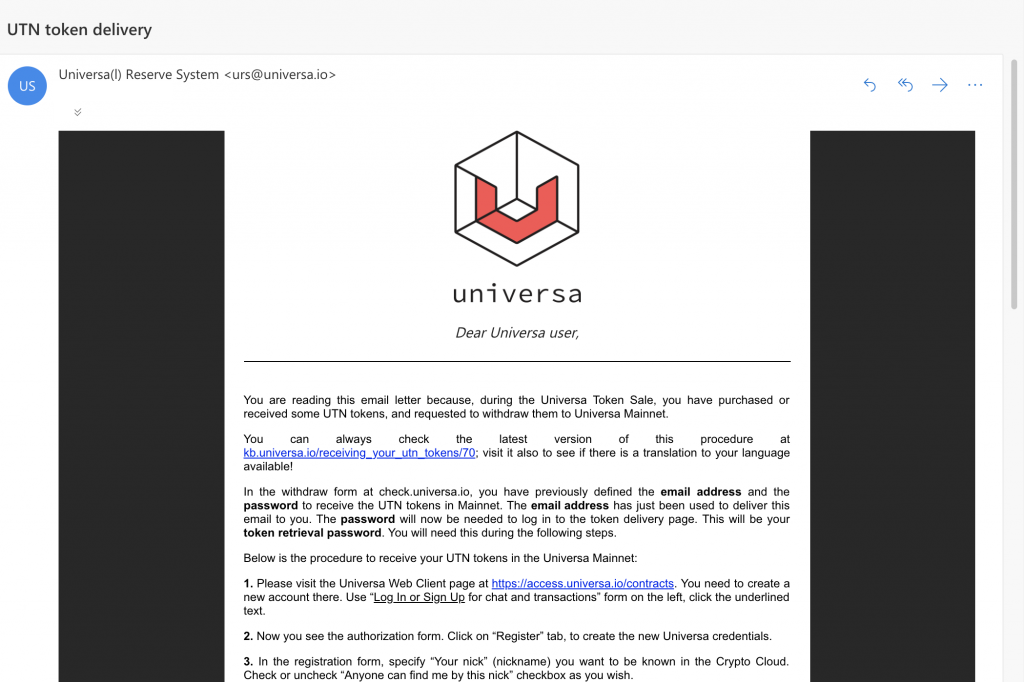
http://universablockchain.com and look for an email from [email protected] (Universa(l) Reserve System) with the subject “UTN token delivery”. Can’t find the e-mail? Make sure to contact one of the admins in of the Universa Telegram chats to ask for the e-mail to be resend to you! Make sure to have this e-mail before continuing with the next steps.
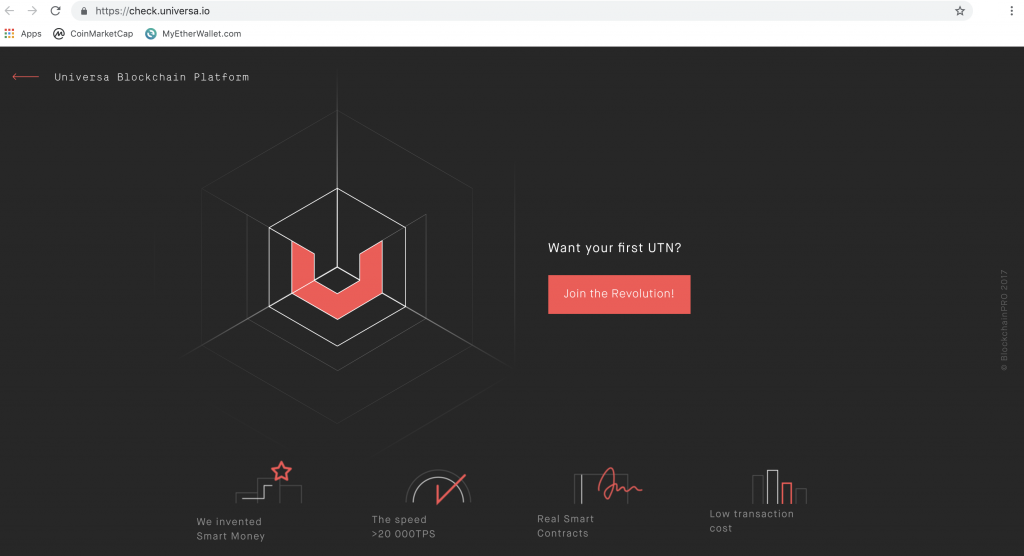
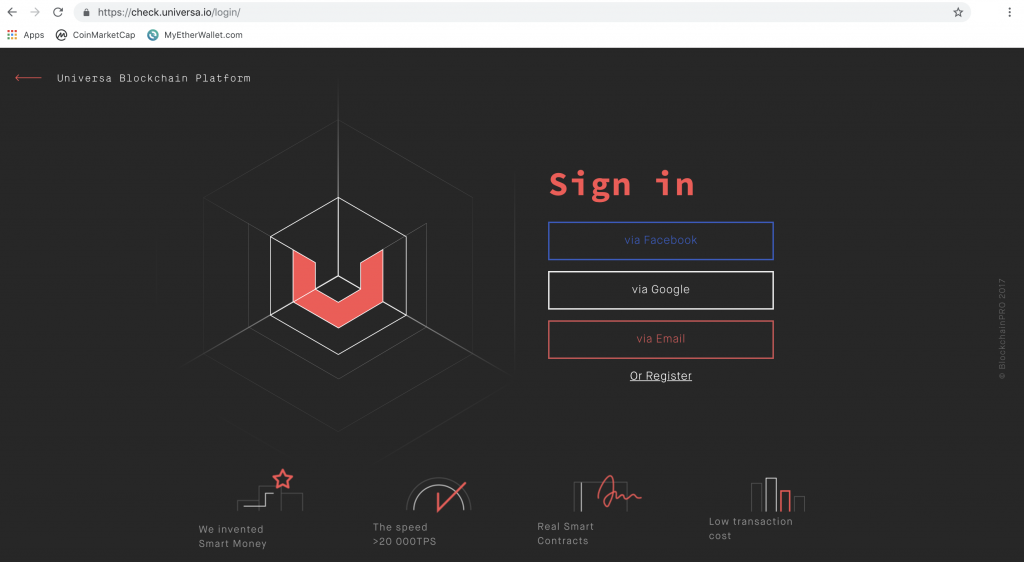
2) Go to http://check.universablockchain.com and click the red button that says “join the revolution” (see Figure 26)
3) You’ll now see a window similar to Figure 27 where you can choose several methods to login, choose the one appropriate for how you registered your account at check.universablockchain.com and login.
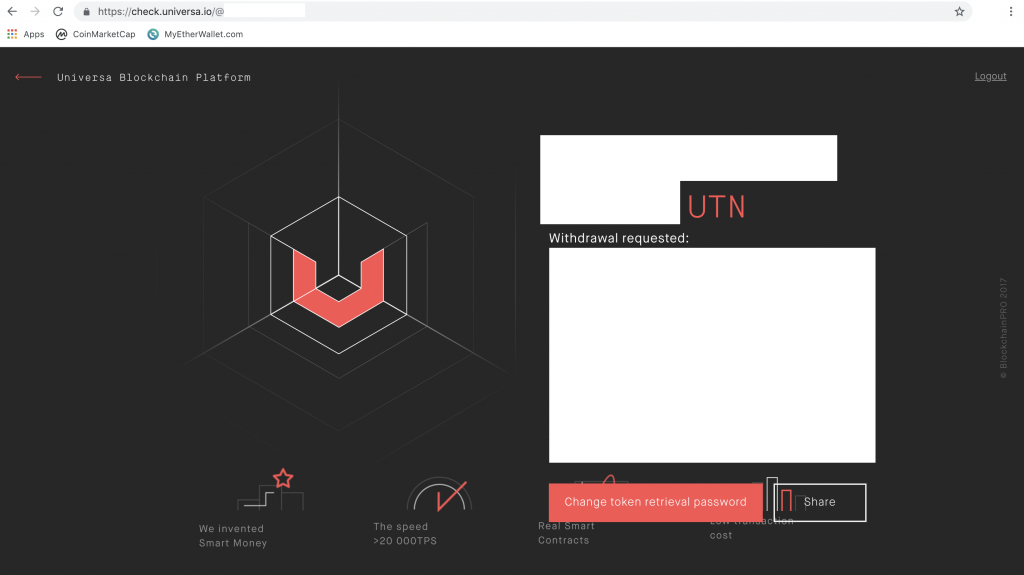
4) After you’ve completed the login procedure (and possibly had to provide a 2FA code) you’ll see a window similar to Figure 28. Click the red button that says “Change token retrieval password”.
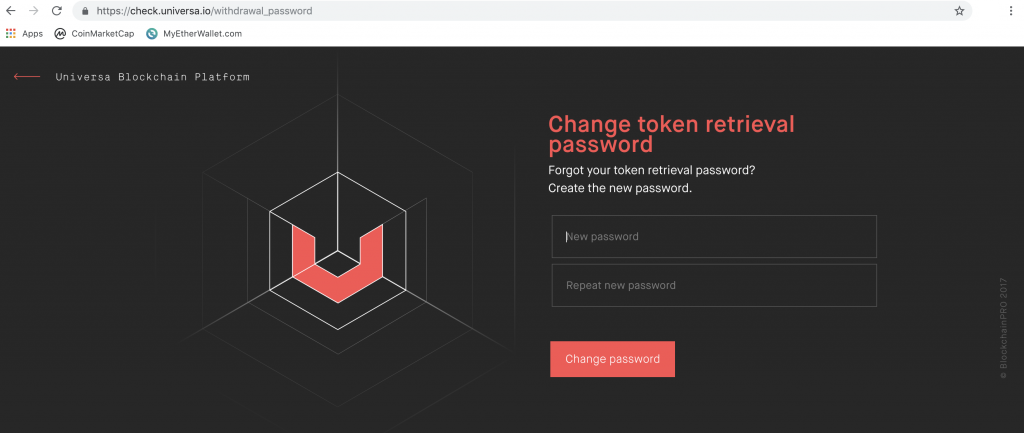
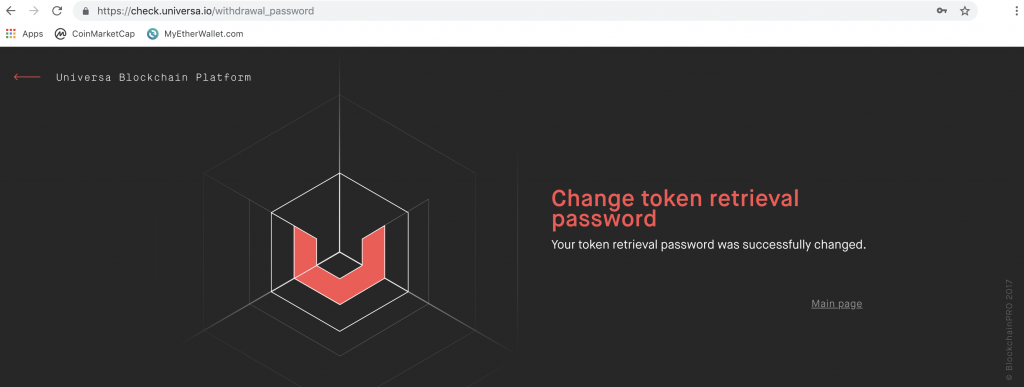
5) You’ll see a window similar to Figure 29. Fill in a password for the retrieval of your tokens (we’ll use this in later steps) in the boxes designated for it and click the red button that says “Change password”. A window confirming that your password has changed (see Figure 30) should appear.
6) Go to https://access.uninversablockchain.com and here you should login using either your private key or your nickname and password (as described above in “Creating an account”). The window to login is slightly different from https://beta.universablockchain.com , please refer to the red box highlighted in Figure 31 and click on “sign up”. The menu that is already visible on Figure 31 will appear and you can now login through two different methods. You can either upload your private key (the green box) and afterwards press the blue button in the bottom of the screen that says “login” or you can provide your nickname and password (the yellow box) and afterwards press the blue button in the bottom of the screen that says “login”.
7) Now that you have logged in at access.universablockchain.com please keep the tab open and go to the inbox of your e-mail address where you have the e-mail that was sent from [email protected]. The e-mail should look somewhat like Figure 32 and Figure 33.
8) Click on the URL that is displayed at step 6. (Figure 33) and wait until the new window is loaded. It should look similar to Figure 34. Here you have to fill in your token retrieval password as specified in step 5) above in the red box you can see in Figure 34. Afterwards press the blue button that says “proceed”.
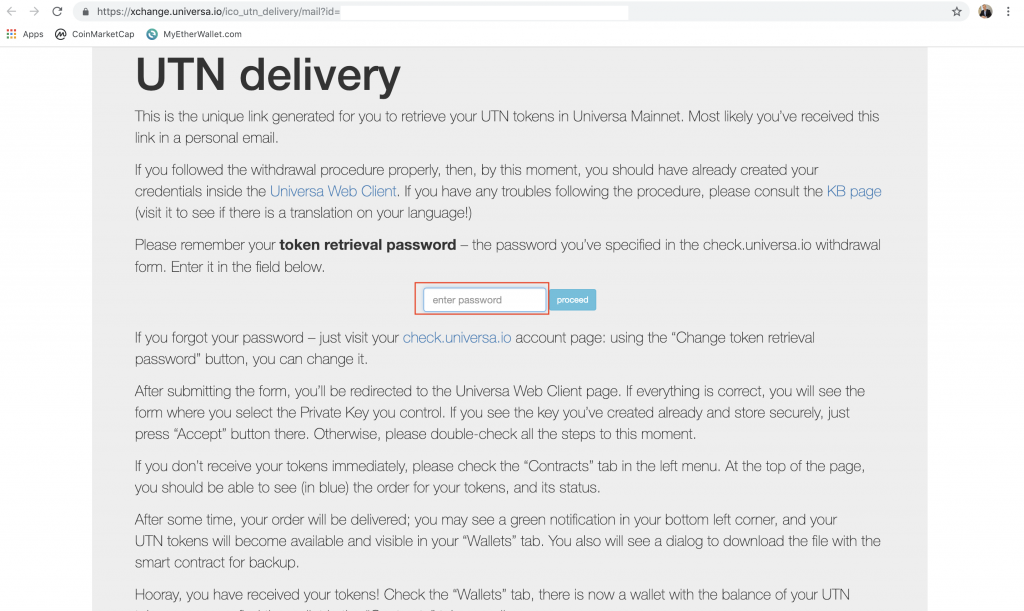
After submitting the form, you’ll be redirected to the Universa Web Client page. You should already be logged in due to the fact that you have a tab open where you are logged in to https://access.universablockchain.com (see step 7).
After some time, your order will be delivered; you may see a green notification in your bottom left corner, and your UTN tokens will become available and visible in your “Wallets” tab. You also will see a dialog to download the file with the smart contract for backup.
Hooray, you have received your tokens! Check the “Wallets” tab, there is now a wallet with the balance of your UTN tokens; you can find the wallet in the “Contracts” tab as well.
If you login to https://beta.universablockchain.com and it does not display your UTN contract/wallet/tokens make sure to download the contract file from https://access.universablockchain.com and upload it to https://beta.universablockchain.com
After it has synced your tokens will be visible there as well in case you would want to swap!